
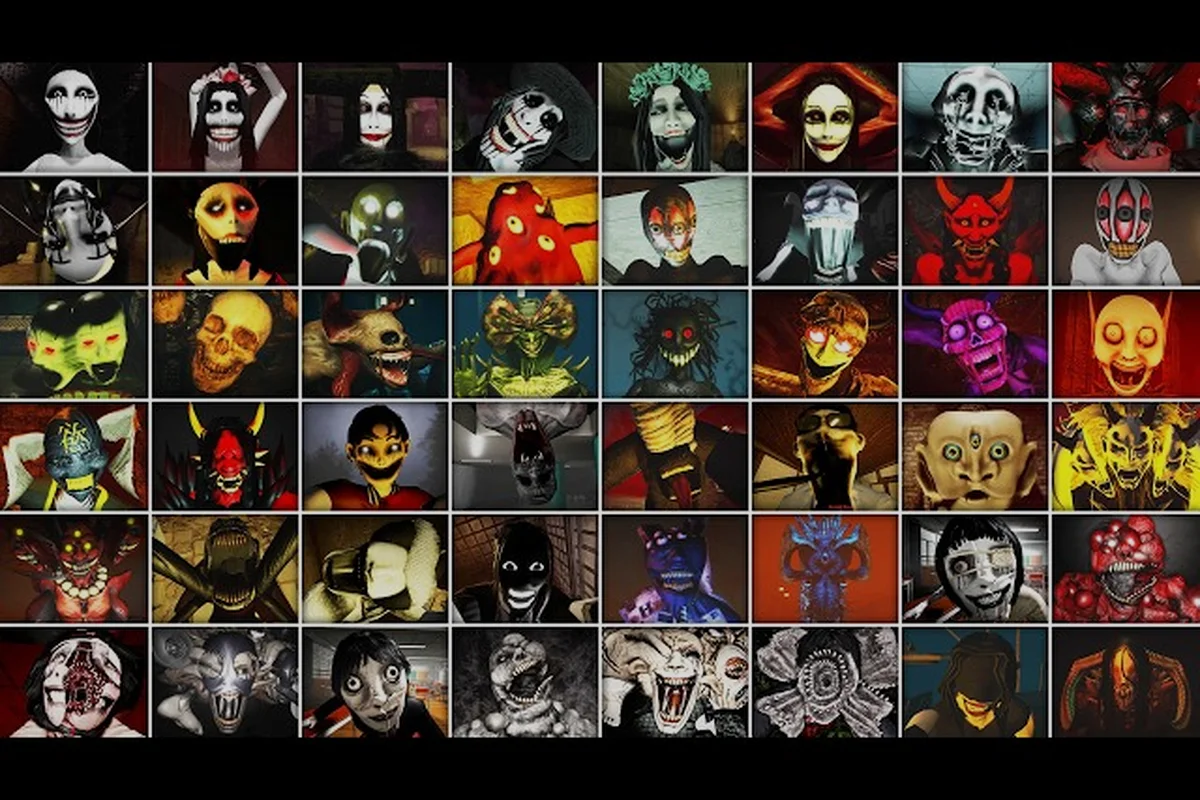
The Mimic jumpscare list matters because recognizing a trigger before it fires can turn a blind chase into a controlled escape. Each entry connects a specific monster to its likely spawn location, attack behavior, and warning signs, helping you distinguish a routine sighting from an imminent jumpscare. For example, noticing a flickering light, severed cables, or an abandoned prop before the Mimic appears can give you a narrow window to secure your position or reach an exit; failing to check those cues usually leaves the player exposed during the reveal.
The Mimic jumpscare list: ten major triggers
A jumpscare in The Mimic usually combines a sudden visual change with a sharp sound, but not every frightening moment comes from a monster rushing toward the player. Some emerge from hiding places, some interrupt a scripted objective, and others punish a missed patrol check. Knowing the difference makes this jumpscare list easier to use in practice.
The list below groups ten recurring trigger categories rather than claiming a fixed frame-by-frame script. Encounter placement can vary by storybook, route, difficulty, and current version, so treat the locations as reliable clues instead of guaranteed coordinates. For example, a locker exit may precede a footstep pursuit, while a Mimic transformation can interrupt a scripted hall encounter if the disguised enemy behaves oddly. Read each trigger through its warning sign—locker movement, repeating steps, changed music, or a search light—then respond with the matching tactic: create distance, break line of sight, or follow the objective marker before the encounter escalates.
| Trigger | Typical source | Main warning sign | Best response |
|---|---|---|---|
| Locker exit | A concealed monster | Locker movement or breathing | Move away and watch the opening |
| Footstep pursuit | Patrolling enemy | Repeating steps behind you | Break line of sight |
| Flash ambush | Close-range monster | Sudden face or body movement | Turn before entering blind corners |
| Scripted hall encounter | Set-piece monster | Music or dialogue changes | Follow the objective marker |
| Search interruption | Searching enemy | Search light or alert sound | Break contact immediately |
| Darkness reveal | Concealed creature | Sudden loss of visibility | Pause near safe light |
| Objective trap | Environment-linked encounter | Doors, lights, or props activate | Use the room's escape route |
| Mimic transformation | Disguised enemy | Wrong movement or reflection | Watch behavior, not appearance |
| Speed burst | Aggressive monster | Fast footsteps or rapid pursuit | Run in a straight, open route |
| Nightmare escalation | Difficulty-modified encounter | Increased aggression and sound | Save resources and prioritize escape |
These ten categories cover the main reasons a The Mimic run can suddenly become frightening, but they also reveal how jump scares differ from ordinary monster encounters. A locker exit depends on recognizing movement before opening the door, whereas a Mimic transformation is triggered by behavioral clues—wrong movement or a mismatched reflection—rather than the enemy’s appearance. For a broader catalog of entities and their roles, compare them with The Mimic monsters list.
Locker and hiding-place exits
A locker exit is among the most recognizable entries in The Mimic jumpscare list because the player often hears a hiding place react before seeing what caused the noise. The safe response is not to open the locker immediately. Step backward, turn toward the opening, and keep enough room to retreat if an enemy is waiting inside.
The danger is especially high when entering a room with several possible hiding spots. Check the approach angle, listen for irregular breathing, and avoid crossing directly in front of an open locker. If the encounter has already triggered, use a doorway or long hallway to break contact rather than trying to fight in the confined space.
Flash and corridor ambushes
Flash encounters reward immediate spatial awareness. A monster may appear at the edge of a corridor, around a desk, or from a door that was previously clear. These events feel unfair when the player is moving at full speed, but the preceding signal is often subtle: an interrupted sound loop, a stationary shadow, or a doorway that fails to close normally.
The best defense is to slow down at junctions and corners. Pause where two escape routes are visible, then move only after checking the darker side of the room. The Mimic where do monsters spawn question is difficult to answer with one fixed map, because several monsters activate through room interaction, proximity, or story state rather than a spawn marker.
The Mimic jumpscare tier list by intensity
Not every scare lands with the same force. The distinction depends on surprise, threat level, recovery time, and how much warning the player receives. This The Mimic jumpscare tier list evaluates those factors for planning, practice, and replay preparation rather than declaring that one monster is objectively superior in every situation.
| Tier | Trigger category | Intensity | Threat after the scare | Typical recovery |
|---|---|---|---|---|
| S | Heard locker opening | Moderate | Low to medium | Turn, identify, and retreat |
| S | Faint movement in darkness | Moderate | Low to medium | Hold position and use light |
| A | Search interruption | High | Medium | Break sight immediately |
| A | Corridor flash ambush | High | Medium | Move before the enemy closes |
| A | Scripted objective trap | High | Medium to high | Follow the intended escape route |
| B | Mimic transformation | Very high | High | Recognize the false behavior |
| B | Fast pursuit burst | Very high | High | Keep moving through open space |
| S+ | Nightmare escalation | Extreme | Very high | Conserve stamina and avoid corners |
A louder event is not always a stronger opponent. A scripted scare can create extreme tension while leaving the player with an easy escape, whereas a quiet monster encounter may remain dangerous long after the initial shock passes. Understanding that distinction is essential when comparing The Mimic scariest monster by strength rather than presentation.
Jumpscare versus sustained danger
The highest-intensity tier contains events that combine a sharp reveal with immediate chase pressure. These encounters are memorable because the player loses control during the first reaction, but the real threat depends on what follows. A monster that briefly appears and then retreats can produce a stronger jump scare than an opponent that remains nearby for an entire minute.
| Comparison factor | Brief flash scare | Sustained pursuit | Scripted encounter |
|---|---|---|---|
| Surprise | Very high | Medium | High |
| Player control | Low at first | Moderate if route is open | Usually restored quickly |
| Resource demand | Usually low | High | Depends on the objective |
| Best skill tested | Awareness | Routing and stamina control | Objective awareness |
| Repeatability | Strong | Moderate | Low to moderate |
Nightmare Mode differences
Nightmare Mode changes the value of every warning sign because sound and enemy behavior can become less forgiving. Players should expect reduced reaction time, more aggressive patrols, and more frequent pursuit pressure, although exact tuning may vary by platform and version. Based on community reports, the safest Nightmare strategy is prevention rather than memorization of a single route.
Prepare by checking safer areas before opening doors, keeping a route with multiple exits, and avoiding prolonged searches when the nearest monster is still active. Save one emergency movement for a sudden Nightmare ambush, and treat a suspicious room as a place to leave rather than a room that must be cleared.
The Mimic monster tier list for jumpscare potential
Monster strength and jumpscare quality are different ideas. A powerful monster may telegraph its attacks and remain predictable, while a weaker creature can dominate short encounters because it appears without warning. The Mimic monster tier list below focuses specifically on jump-scare impact, making it useful for players who want to understand each threat without confusing visual shock with actual danger.
| Monster category | Jumpscare rating | Search tendency | Pursuit tendency | Counterplay |
|---|---|---|---|---|
| Locker-based creature | 5/5 | High | Medium | Listen and keep clear of openings |
| Imitation or mimic type | 5/5 | Medium | High | Watch for behavior changes |
| Fast close-range creature | 4/5 | Medium | Very high | Use open routes |
| Searching creature | 4/5 | High | Medium | Break line of sight |
| Slow patrol creature | 3/5 | Low | Low | Track footsteps and pathing |
| Environmental creature | 4/5 | Low | Medium | Learn activation conditions |
| Night-only variant | 4/5 | Varies | Varies | Account for darkness effects |
This rating describes jumpscare potential, not a promise of exact spawn odds. Storybook progression, completed tasks, and current difficulty can change which entities appear, so the The Mimic monster tier list should be treated as a behavioral reference rather than a fixed difficulty chart.
The Mimic best monsters for surprise
The strongest jump-scare candidates combine two traits: they can appear suddenly, and they remain threatening after the reveal. Imitation-type enemies are notable because the warning may come from behavior rather than appearance. A companion that moves incorrectly or repeats a familiar routine can reveal that an enemy has taken its place before the final reveal.
Close-range pursuers are similarly effective because they reduce reaction time, but open hallways and looping routes make them easier to handle. Searching enemies create pressure when their light or sound reaches the player, yet breaking sight often ends the immediate chase. For deeper information about abilities and patrol behavior, the guide to The Mimic monster patterns expands on movement and escape techniques.
Locker, imitation, and search archetypes
These three archetypes produce different scares. A locker creature emphasizes anticipation because the player knows a hiding place exists but not whether it contains an enemy. An imitation creature emphasizes observation because familiar behavior becomes suspicious. A searching creature emphasizes movement because remaining still may be worse than changing direction.
| Signal | Locker creature | Imitation creature | Searching creature |
|---|---|---|---|
| Sound before reveal | Locker hinge or breathing | Unusual dialogue or footstep | Search light, call, or alert tone |
| Best preventive action | Keep locker openings visible | Verify expected behavior | Break line of sight early |
| Common mistake | Open the locker immediately | Trust a familiar routine | Freeze inside the search path |
| Escape priority | Medium | High | High |
Where monsters spawn and what activates them
Monster spawn locations are usually tied to a storybook area, room, objective, or interaction rather than a single monster list. That makes The Mimic monster spawn locations a more accurate concept than a fixed coordinate table. The same creature may patrol a hallway during one route, hide in a locker during another, or appear only after a relevant task changes the level state.
Useful activation clues include repeated audio loops, doors that change position, objects left open, changes in lighting, and characters who stop following their expected route. These details often indicate that a monster has taken control of the area. Watching the The Mimic locations list can help identify safe rooms, looping corridors, and objective spaces before beginning a chapter.
| Location type | Likely trigger environment | Spawn clue | Preparation |
|---|---|---|---|
| Locker corridor | Narrow passage with hiding spots | Locker sound or movement | Keep the opening in view |
| Objective room | Searchable furniture and doors | Prop state changes | Clear exits first |
| Search corridor | Long sightline with active light | Moving search beam | Use cover and side rooms |
| Dark room | Low visibility | Missing footsteps or shadow | Pause before entering |
| Junction | Several connected paths | Ambiguous sound source | Check one route at a time |
| Scripted arena | Fixed encounter area | Music or objective shift | Follow the intended path |
Book progression and encounter activation
Later storybooks generally provide more opportunities for layered threats because rooms contain more active objectives and stronger enemies. Early areas tend to introduce movement patterns more directly, while later areas can punish delayed progress, ignored instructions, or repeated searches in the same location. This progression is reported by players, while exact spawn conditions can change with game updates.
For The Mimic where do monsters spawn questions, observe the current task first. A monster linked to a room often becomes active when the player enters, interacts with an object, completes an objective, or breaks a required item. The correct preparation is to read the current objective and listen for state changes instead of memorizing one route indefinitely.
Safe rooms and false security
Safe rooms offer valuable breathing room, but entering one immediately after a chase can leave the player unprepared for the next activation. Search for exit visibility, confirm that doors behave normally, and listen for pursuit sounds beyond the room. A room that feels secure may also contain a locker, concealed entrance, or activation tied to the next task.
Do not waste supplies while assuming the danger has passed. Safe-room discipline means checking the doorway, preserving an escape route, and listening before committing to a search. It also prevents the common mistake of rushing back into a corridor before the pursuing enemy has moved away.
The Mimic jumpscare list response guide
A useful jumpscare list should tell you what to do after the reveal, not merely identify what frightened you. The first move should always reduce immediate danger: turn away from a confined space, run through an open route, or create distance if a pursuit begins. Panic attacks often make players move toward the nearest doorway, which can be exactly where an enemy expects them.
First five seconds after a scare
-
Identify the sound source only when it does not require turning your back on an approaching enemy.
-
Move to open space because corners and lockers limit escape options.
-
Keep moving past blind corners, then pause only when the route behind is clear.
-
Use the objective, since a completed task may deactivate the encounter.
-
Reset your attention, because one nearby monster can mask another sound or route.
| Reaction | Likely result | Better alternative |
|---|---|---|
| Freeze in place | Misses early movement cues | Use sound to choose a direction |
| Run into a dead end | Traps the player | Choose open loops first |
| Open a locker | Reveals another threat | Check from a safe angle |
| Continue the objective blindly | May trigger a new event | Scan and listen first |
| Turn immediately | Abandons a safe route | Preserve movement while reassessing |
Recognizing the repeated trigger
Once the player recognizes a trigger pattern, the encounter becomes manageable. A locker sound followed by a pause often indicates a hidden enemy; a search light sweeping a corridor means moving out of its path; and a familiar companion behaving incorrectly suggests an imitation threat. Trigger recognition is the difference between reacting to the animation and predicting the encounter.
The same principle applies during repeated runs. Notes should record the room, nearby objective, sound cue, and escape direction rather than only labeling the monster. That level of detail supports faster progression through The Mimic jumpscare list scenarios without turning the experience into a rigid memorization exercise.
Frequently Asked Questions
What causes the most common jumpscares in The Mimic?
Locker exits, corridor reveals, and search interruptions are among the most common causes. They work because the player is often close to furniture, turning a corner, or committing to an objective. Listening for unusual sounds and checking nearby approaches can reveal many of them before the full reveal occurs.
Are the same monsters used for every jumpscare?
No. A single monster can produce different scares depending on its role, including hiding, pursuing, searching, or imitating another character. Storybook progression, current objectives, route, and difficulty influence which behaviors are available, so this jumpscare list focuses on trigger categories rather than permanent enemy assignments.
Where do monsters usually spawn in The Mimic?
They commonly appear near lockers, searchable rooms, dark corridors, junctions, and objective spaces. Many encounters activate when a player enters a room, interacts with an object, or changes the task state. Because placement varies, checking the environment and current objective is more reliable than relying on one fixed spawn point.
Does Nightmare Mode have unique jumpscare triggers?
Nightmare Mode can intensify familiar encounters and introduce harsher versions of existing behaviors. Players report increased pursuit pressure, faster reactions, and less forgiving sound cues, although exact tuning may vary by platform or version. Prevention and route control remain the most dependable defenses against these changes.
Can players prevent every jumpscare?
No, but preparation can reduce many encounters. Check room entrances, preserve open escape routes, listen during suspicious moments, and avoid lingering where objectives can change unexpectedly. The goal is not to eliminate every surprise but to recognize the warning signs early enough to retain control.